WordPress Setup
Learn how to connect your WordPress store to BlueSnap for global payment processing.

WordPress is web publishing software you can use to create your own website or blog and has become one of the most popular web publishing platforms, powering 30% of the entire web. It’s a highly flexible content management system (CMS) that lets you build and manage your own website using just your web browser. By connecting your store to BlueSnap, you can securely accept card payments. Because the payment form is embedded in your checkout form, shoppers enjoy a frictionless checkout experience.
Supported features
3D Secure
Auth/Capture and Separate Auth and Capture
Chargeback Management
Fraud Prevention
Built-in Fraud Prevention and Risk Management
Enhanced fraud using Device Data Collector
Hosted Payment Fields
Multiple Currencies and Multiple Languages
Partner Sandbox Testing
Payment Analytics and Reporting
Payment Methods: Credit/Debit Cards and LatAm Local
Payment Optimization
Vaulted Shoppers
Requirements
The BlueSnap module is supported for WordPress version 4.9 and higher.
A BlueSnap account
If you need a BlueSnap account, go to the BlueSnap website to get started.
WordPress software
This guide assumes that you already have WordPress setup on your server. For instructions, see WordPress Support.
HTTPS configuration
BlueSnap requires a secure connection to process payments. You need to ensure that your domain is SSL certified and SSL is enabled.
Supported currencies
BlueSnap supports the currencies listed here. We recommend configuring your store to only accept currencies supported by BlueSnap.
Supported countries
BlueSnap supports the countries listed here. If a shopper is located in one of these supported countries, they will be able to purchase with the BlueSnap payment module.
PCI compliance
A PCI compliance of SAQ-A is required.
Step 1: Configure your BlueSnap account settings
Complete these steps in your Merchant Portal for production or sandbox.
- Get your BlueSnap API credentials and define the authorized IP addresses for your server. Both of these actions are performed on the same page; for instructions click here.
Note: If you are unable to provide static IPs for your servers, contact BlueSnap Merchant Support so we can disable IP checking on your account.
- To get paid, you need to configure your payout settings. Refer to Payout for more information.
Step 2: Install and upload the BlueSnap module
-
From the WordPress dashboard, choose Plugins > Add New.
-
If your WP site is hosted on WordPress.com:
a) Search for “BlueSnap” and install the “BlueSnap All in One Platform” plugin.
b) Click Activate Plugin.If your WP site is hosted on your own private server:
a) Download the BlueSnap plugin file (bs-forms.zip).
b) In WordPress, click Upload Plugin at the top of the page and select the BS plugin file you just downloaded.
c) Click Install Now.
d) Click Activate Plugin.
Step 3: Configure the BlueSnap module
Complete these steps in your WordPress account. Note: You need your gateway credentials from BlueSnap for this.
-
Go to Settings > BlueSnap.
-
Select Live or Test and enter your BlueSnap API credentials for each environment.
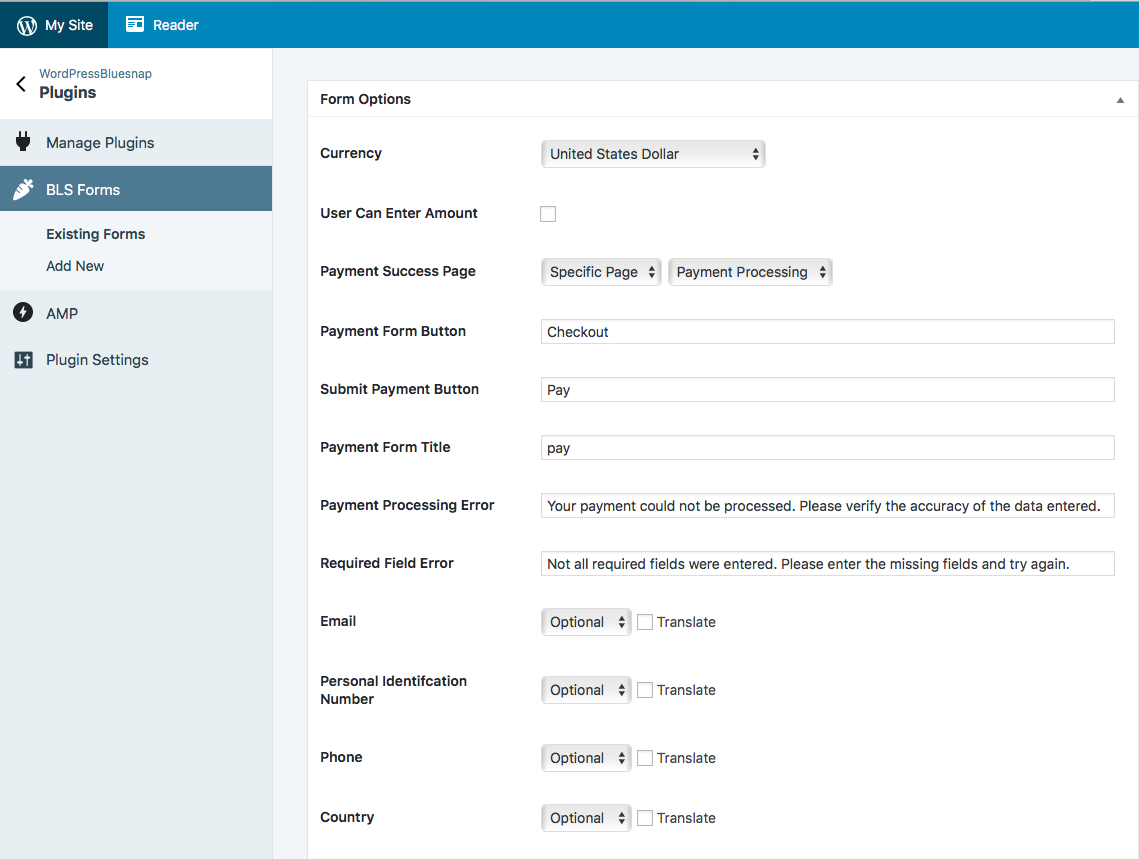
- Go to Settings > BLS Forms to configure the payment form layout for your store. Note: You will need to create one form per language you want to offer.

Step 4: Set up IPNs
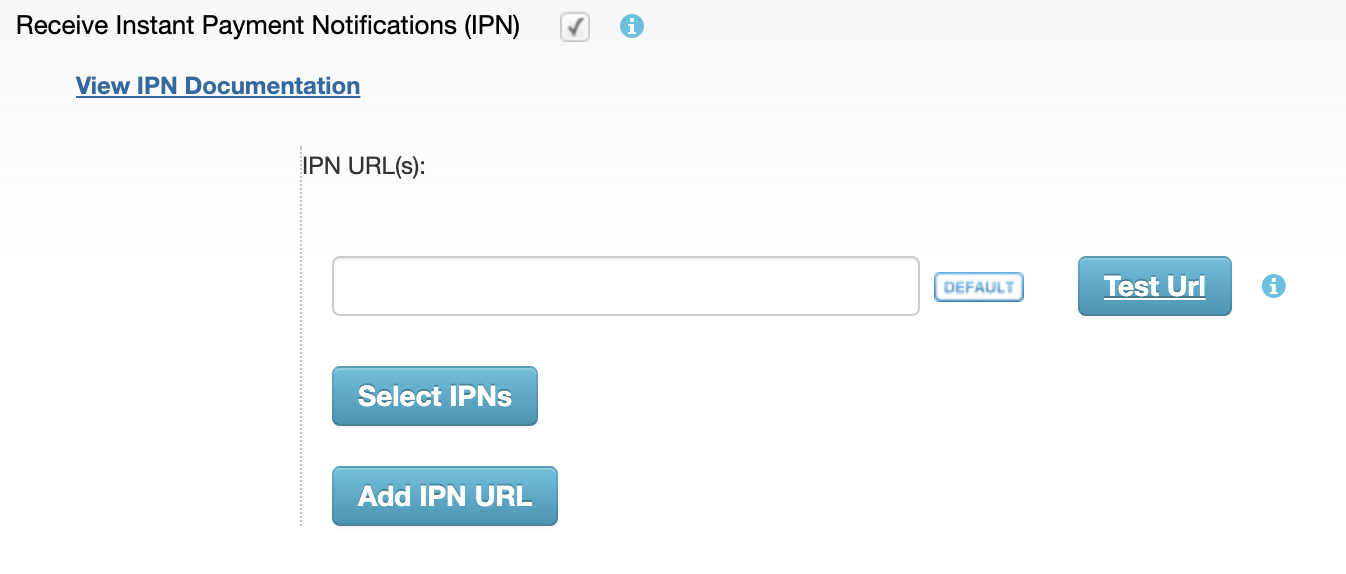
Instant Payment Notifications (IPNs), also known as webhooks, are HTTP POST messages that are sent to your backend when an important event occurs, such as the completion of a sale. An overview of IPN functionality can be found here. If you would like to leverage the IPN functionality, you will need to code the IPN receiver on your backend and follow the steps below to set up IPNs.
-
Log in to your BlueSnap account and go to Settings > IPN Settings.
-
Select the Receive Instant Payment Notifications check box.
-
Update the IPN URL(s) field with the URL where you want to have your IPNs sent.

-
To enable specific IPNs, click Select IPNs. In the section that opens, toggle the button next to the IPN to select it.
-
Click Submit.
Updated 3 months ago
