Taxes in checkout pages
Avalara
To best support our merchants, we have partnered with Avalara to simplify the complexities of calculating and charging tax. If you use the Hosted Checkout Page and need details on how Avalara is set up for your account, contact Merchant Support.
Note: If you’re using our API solution and you want to learn more about taxes, visit our Tax Guide.
To charge tax or VAT on your shopper’s orders you will need to calculate the tax or VAT amount on your side, for example by integrating with a tax calculation provider. You can then pass the tax amount to the checkout page and include it in the amount charged to the shopper.
Step 1: Gathering required tax details and connecting with your tax calculation provider
In order to calculate the correct amount of tax or VAT, you will typically need to gather specific information from your shoppers and then pass that information to your tax calculation provider. The required information varies based on location, but usually includes the shopper’s country, state/region, and VAT ID or tax ID and amount.
You should work with your tax calculation provider to define which data is required and then make sure that you gather this data from the shopper on your site. You can then pass this information to your tax calculation provider to determine what tax or VAT % needs to be charged based on the country and whether or not they are tax or VAT exempt.
Once you have received the amount of tax or VAT from your tax provider to be charged to your shopper, you can then pass it to the checkout page as described in step 2.
Step 2: Passing the tax amount to your checkout form
After you have determined the amount of tax or VAT to charged, you can pass this information to the checkout page using one of the two solutions described below.
Note: When you send the shopper to the checkout page you may wish to prepopulate some of the fields, such as the country, with the information you already gathered from the shopper. This reduces checkout friction, as the shopper will have to complete fewer fields in order to finish checking out. To pass information into the checkout page, you can use our Hosted Checkout parameters. For details, refer to Hosted Checkout Parameters.
Solution 1: Add the tax to the total amount
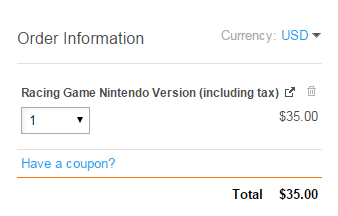
With this solution, you use the override price capability to send the new price, including tax, for display on the checkout page. For example, if the product price is $30 and you charge $5 tax, you can override the main contract price to set it to $35. If you are using this solution, you may also want to change the main contract’s name to indicate that it includes tax.
The benefit of this option is that the tax amount carries forward on a subscription. For example, if our Subscription Manager is being used and the total price (product + tax) is $35, then the shopper is charged $35 each period. The drawback of this option is that there is no separate reporting on tax.
This is an example of the order information on a checkout page where the price was overridden to include tax:

How: Use the override price capability to change the price on the checkout page to include the tax amount you have calculated. Refer to Overriding the price.
Solution 2: Add a separate contract for the tax
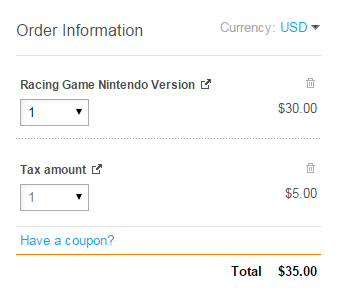
With this solution, you set up an additional contract for the tax, and then use URL parameters and the override price capability to add the tax contract to your checkout page and override its price with the relevant tax amount. For example, if the product price is $30 and you charge $5 tax, you can add a contract for the tax and override that tax contract’s price to set it to $5.
The benefit of this option is that the tax is represented on all BlueSnap reports as a distinct amount from the main product. The drawback is that tax is not carried forward on any recurring charges when using our Subscription Manager.
This is an example of the order information on a checkout page where a separate contract was added for tax, and the tax amount was overridden to show the relevant value:

How
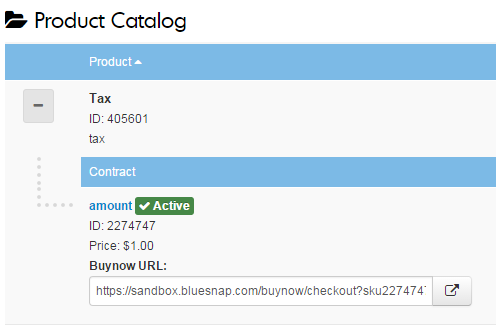
- Create a new product just for tax purposes, with a one-time contract under the product. You may want to name the product “Tax” and the contract “amount” so it appear as “Tax amount” on the checkout page.

-
Add the tax contract to the main products checkout page by adding the tax contract’s ID number in the checkout page, using the
sku{contractID}=1parameter. For example, the following checkout page URL is for a contract with ID 2269665, and the tax contract with ID 2274747 is added to the end of the URL:
https://sandbox.bluesnap.com/buynow/checkout?sku2269665=1&storeid=17125&sku2274747=1 -
Use the override price capability to change the price of the tax contract to show the tax amount you have calculated. If the shopper is not taxable, you can always set the contract’s price to $0. Refer to Overriding the price.
Updated 3 months ago
