
Page Design and Custom Fields
Configuring Payment Page Display
The Payment Page provides options that let you customize the checkout page for BlueSnap Checkout, Payment Link, and Virtual Terminal.
If you want to choose your payment page colors or add/remove features from the display, you can change your display preferences using your BlueSnap Merchant Portal. To navigate to display preferences, click BlueSnap Checkout > Checkout Settings in the left-side menu.
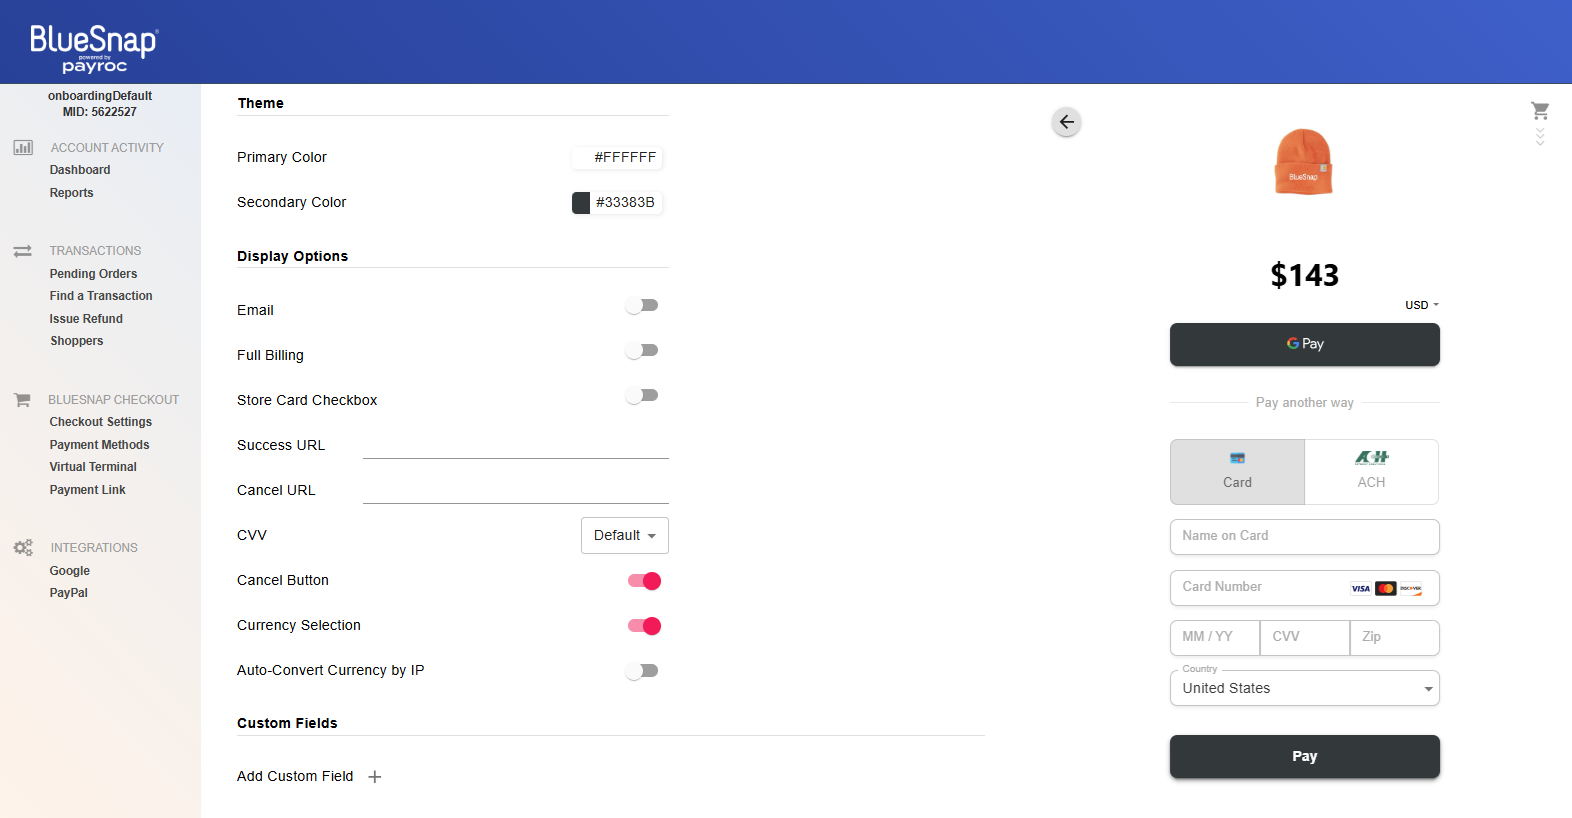
Some of the settings you can change include page colors, displaying a "cancel" button, and defining custom fields. Once your changes are complete, be sure to click CONFIRM CHANGES . This is the resulting BlueSnap Checkout page:
Settings
| Setting | Description |
|---|---|
| Theme | Primary and secondary checkout page colors. |
| Collect email. | |
| Full Billing | Collect full billing details. |
| Store Card | Activate checkbox that allows shoppers to store their card. Useful if you want to utilize Returning Shoppers. |
| Success URL | Define a default URL where BlueSnap directs the shopper if the transaction is successful. Defining a default here prevents sending the successUrl parameter as part of the token creation request. |
| Cancel URL | Define a default URL where BlueSnap directs the shopper if the transaction is cancelled. Defining a default here prevents sending the cancelUrl parameter as part of the token creation request. |
| Cancel Button | Display a cancel button on the checkout page. Clicking the cancel button redirects the shopper to the cancel URL you defined for the session. |
| Currency Selection | Allow your customers to select a currency on the checkout page. |
| Auto Convert Currency by IP | Allow the currency to be determined by your shoppers IP address. |
| Custom Fields | Additional fields that you want BlueSnap to collect on the checkout page. Available field types: Input: define minimum and maximum input lengths using the ‘EDIT’ button. Select: define the select options using the ‘EDIT’ button. Toggle: Read-only Fields can be set to mandatory or optional. |
Displaying Images on your Checkout Page
You might want to display images on the checkout page to represent the products/services being purchased. In order to do this, you'll first need to upload these images to your BlueSnap Merchant Portal by following these steps.
-
In your Merchant Portal, go to Settings > General Settings.
-
Under Account Settings, click My Images.
-
Click Choose File, select the image you want to upload, then click Upload.
After your image file uploads, you can reference it by its relative URL. For example:
- File URL:
https://sandbox.bluesnap.com/developers/571747/download.jpg - Relative URL:
/developers/571747/download.jpg
Image File Restrictions
| Restriction | Limit |
|---|---|
| Number of files | 100 files |
| Size of all files combined | 200 MB (209715200 bytes) |
| Size of a single file | 1048576 bytes (1 MB) |
Image size
We recommend uploading an image that is 300px by 300px for the best display.
Updated 5 days ago