Shopify Setup

This setup guide supports the Embedded App Redirect option for Shopify.
For the setup guide for Shopify's Inline Checkout option, click here.
Requirements
Shopify and BlueSnap accounts
You must have accounts at both Shopify and BlueSnap to proceed.If you need a Shopify account, go to the Shopify site to sign up.
If you need a BlueSnap account, go to the BlueSnap website to get started.
Supported currencies
BlueSnap supports the currencies listed here. We recommend configuring your store to only accept currencies supported by your BlueSnap configuration.Supported countries
BlueSnap supports the countries listed here. If a shopper is located in one of these supported countries, they will be able to purchase with BlueSnap payments.
Before you begin:
Contact your Implementation Manager or merchant support at [email protected] to get your account ready for integration.
Step 1: Configure BlueSnap Account Settings
Before you install the BlueSnap plugin in Shopify, complete these steps in your BlueSnap account:
-
Set up your BlueSnap API username and password and define the authorized IP addresses. For instructions, see API Credentials.
-
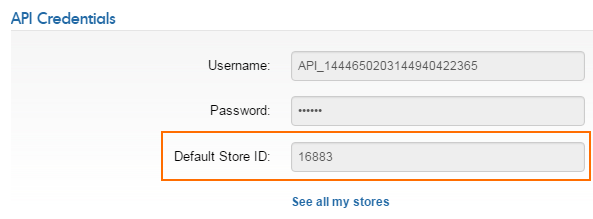
Make a note of your BlueSnap Store ID, which you will need when configuring the plugin. Your Store ID is displayed on the API Settings page.

- Define your Data Protection Key by going to Checkout Page > Payment Methods and entering a string of at least 6 characters in the Data Protection Key field.

Step 2: Install BlueSnap App in Shopify
-
Get the BlueSnap App from the Shopify App Store at the following URL: https://apps.shopify.com/bluesnap-app.
-
Click Get.

- Log into your Shopify account and then click Install app.
Step 3: Configure BlueSnap App
- In your Shopify dashboard, go to the Apps tab and click on the BlueSnap app in the list of installed apps. The BlueSnap configuration page will open.

- In the BlueSnap Sandbox Settings and BlueSnap Production Settings sections, enter your credentials for each of the BlueSnap environments, plus the relevant store ID for each (which you located in Step 1).
Do not enter anything in the Contract ID field. It will be generated automatically.
-
Click Save.
-
In the BlueSnap Payment Gateway section, click Edit BlueSnap payment gateway. The Add BlueSnap Payment Gateway page will open (this page might open in a new tab depending on your browser settings).
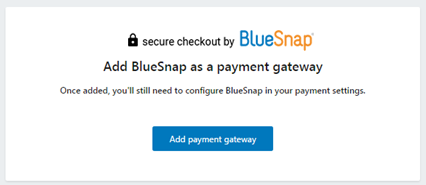
- Click Add payment gateway. The Settings > Payments page will open.

- In the Shopify Payments section, click Change Provider.
- Select Third party credit card provider
-
Choose BlueSnap Payment Gateway as the Provider and click Continue.
-
In the BlueSnap Payment Gateway Credentials section, do the following:
a. If you are using the BlueSnap Sandbox (i.e. test mode), select the Use test mode checkbox.
b. Enter your Shopify shop name, and your BlueSnap API password for either the Sandbox or Production environment, depending on which you are using.
c. Click Save.
Collect first and last name on your checkout form
BlueSnap requires the shopper's first and last name to process transactions, so this information needs to be collected on the checkout form.
Please complete these steps:
- In your Shopify admin account, go to Settings > Checkout.
- In the Form options section, select Require first and last name.
- Click Save.
Congratulations, you have finished setup and are now ready to start selling using our comprehensive, secure and easy payment gateway!
Issuing refunds
To issue refunds, do the following:
-
Issue the refund in your BlueSnap Console.
-
Refund and/or cancel the order in your Shopify admin account.
Updated 5 months ago
