Virtual Terminal (Beta)
with BlueSnap Checkout
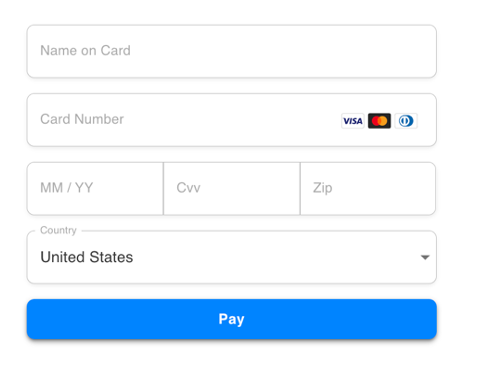
BlueSnap’s Virtual Terminal is a web-based application that enables you to process payments received via phone, fax, email, or chat without any additional software, hardware, or coding required.
The main difference between Virtual Terminal and other BlueSnap Checkout solutions (Payment Link or BlueSnap Checkout) is that as a merchant, you input the payment details on behalf of the shopper.
Features
BlueSnap Virtual Terminal supports all the features that BlueSnap Checkout and Payment Link offer: 100+ currencies, multiple languages, global payment methods, and more.
Note: Some payment methods or features may not be supported, particularly in cases where you do not have the shopper’s credentials (i.e. Apple Pay, Google Pay, PayPal, 3DS).
PCI Compliance
A PCI-compliance level of SAQ C-VT or SAQ-C is required to use the Virtual Terminal. If you're certified for SAQ D, you are automatically covered for all other SAQ levels. Until you provide proof of compliance, Virtual Terminal will not be enabled on your merchant portal.
Virtual Terminal Setup
Before you get started, be sure to work with your BlueSnap Implementation Engineer to get PCI qualified. If you are already SAQ-C, SAQ-CVT or SAQ-D complaint, you don't need to re-do the PCI questionnaire.
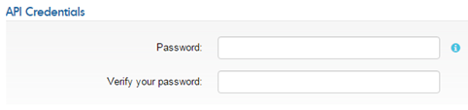
Step 1: Set your API credentials and Data Protection Key for security purposes.
- Go to Settings > API Settings in the top menu of the Merchant Portal.
- Define and verify your API password in the respective fields.
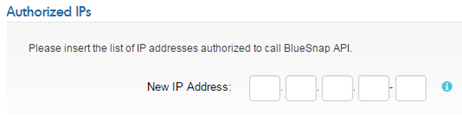
- In the New IP Address field, enter the IP address to be used for API calls. You can add up to fifteen IP addresses or a subnet.
- Click Request API Credentials. The credentials are generated, and your new API username is displayed.
In the Data Protection Key field, enter a password with at least 6 characters and click Submit.

Step 2: Customize fields
Navigate to Page Design on the left-hand menu to add or remove fields from your Virtual Terminal, such as full billing, email, or any other custom fields.
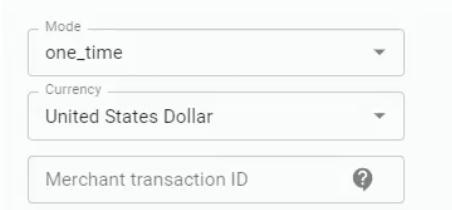
Step 3: Configure Virtual Terminal settings
On the left-hand menu in your Merchant Portal, navigate to Virtual Terminal. There, you can make adjustments to Virtual Terminal settings like:
- Mode: Select ‘one_time’ for an individual transaction or ‘subscription’ for a subscription or recurring billing.
- Currency: Choose a shopper currency.
- Merchant Transaction ID: Merchant's unique ID for a new transaction.
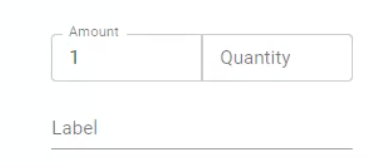
- Label: For each item you add, provide a description of the product or service.
You're all set! Now you can accept payments via phone, fax, email or chat.
Updated 5 months ago