Page Design and Custom Fields
Configuring Payment Page Display
If you want to choose your payment page colors or add/remove features from the display, you can change your display preferences using your BlueSnap Merchant Portal. To navigate to display preferences, click Hosted Pages under CHECKOUT PAGE in the left-hand menu.
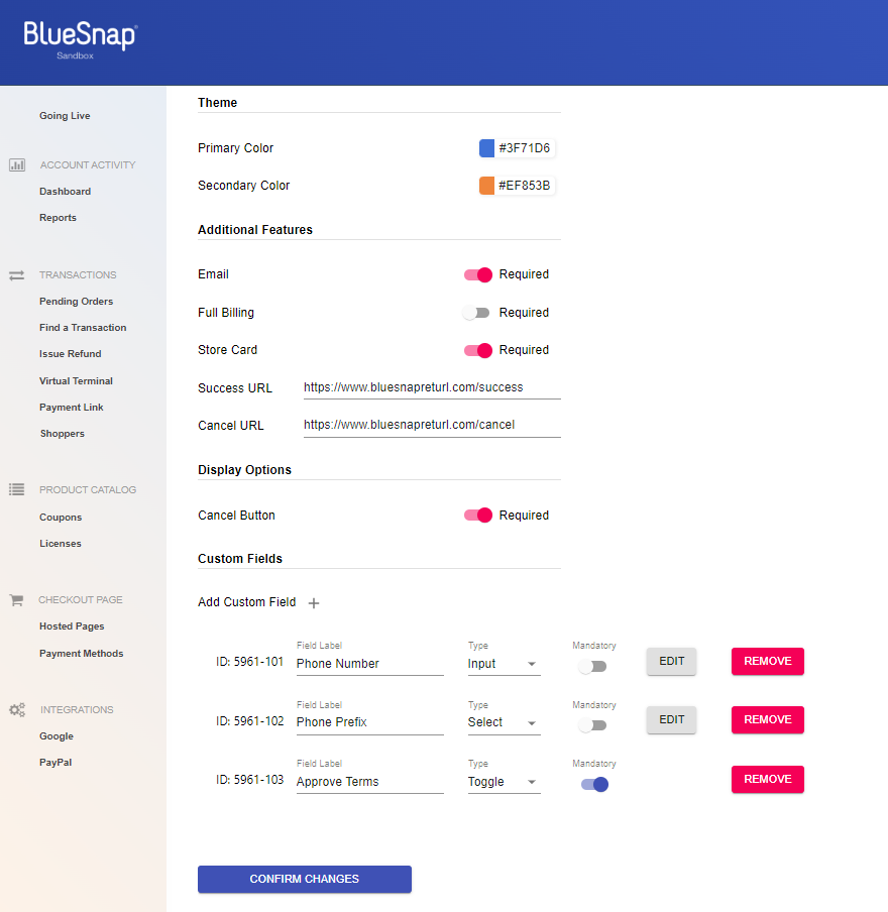
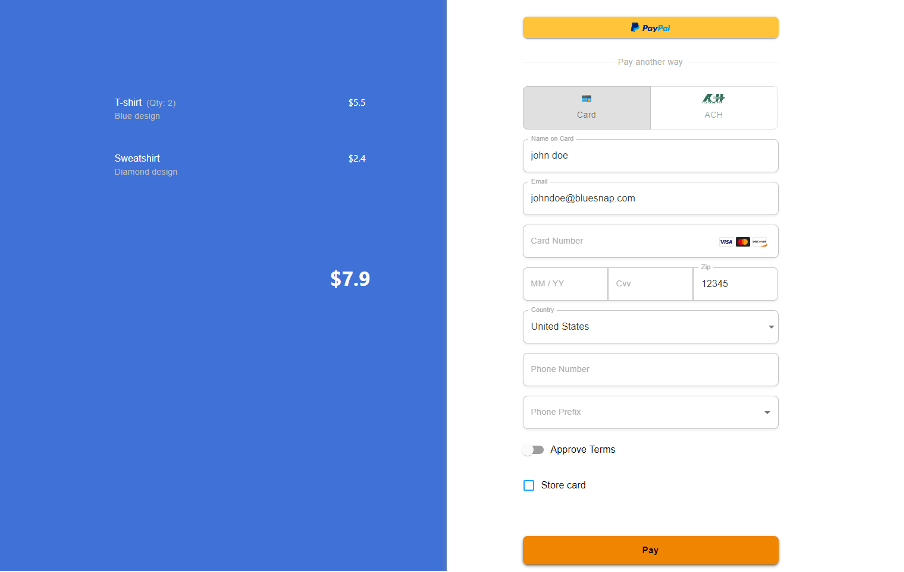
Some of the settings you can change include page colors, displaying a "cancel" button, and defining custom fields. Once your changes are complete, be sure to click CONFIRM CHANGES . This is the resulting BlueSnap Checkout page:
Settings
| Setting | Description |
|---|---|
| Theme | Primary and secondary checkout page colors |
| Collect email | |
| Full Billing | Collect full billing details |
| Store Card | Activate checkbox that allows shoppers to store their card. Useful if you want to utilize Returning Shoppers. |
| Success URL | Define a default URL where BlueSnap will direct the shopper if the transaction is successful. Defining a default here will allow not sending the “successUrl” parameter as part of the token creation request. |
| Cancel URL | Define a default URL where BlueSnap will direct the shopper if the transaction is cancelled. Defining a default here will allow not sending the “cancelUrl” parameter as part of the token creation request. |
| Cancel Button | Display a cancel button on the checkout page. Clicking the cancel button redirects the shopper to the cancel URL you defined for the session. |
| Custom Fields | Additional fields that you want BlueSnap to collect on the checkout page. Available field types: - Input: define minimum and maximum input lengths using the ‘EDIT’ button - Select: define the select options using the ‘EDIT’ button - Toggle - Read-only Fields can be set to mandatory or optional. |
Displaying Images on your Checkout Page
You might want to display images on the checkout page to represent the products/services being purchased. In order to do this, you'll first need to upload these images to your BlueSnap Merchant Portal by following these steps.
-
In your Merchant Portal, go to Settings > General Settings.
-
Under Account Settings, click My Images.
-
Click Choose File, select the image you want to upload, then click Upload.
After your image file uploads, you can reference it by its relative URL. For example:
- File URL:
https://sandbox.bluesnap.com/developers/571747/download.jpg - Relative URL:
/developers/571747/download.jpg
Image File Restrictions
| Restriction | Limit |
|---|---|
| Number of files | 100 files |
| Size of all files combined | 200 MB (209715200 bytes) |
| Size of a single file | 1048576 bytes (1 MB) |
Image size
We recommend uploading an image that is 300px by 300px for the best display.
Updated 29 days ago